Add a POP3 account on your iPhone & iPad
Setting up your iPhone (or iPad) unfortunately isn't that simple sue to some limitations and issues with the default Mail application on these devices. It only needs to be set up once though!
Please note that by default the Mail app will want to set up your account as an "IMAP" account. You must remember to choose POP instead!
To add a new POP3 email account:
- Go to Settings -> Mail, Contacts, Calendars -> Add Account...
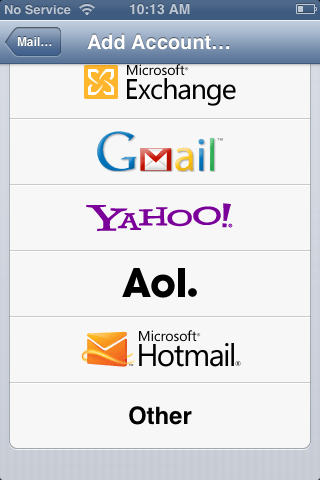
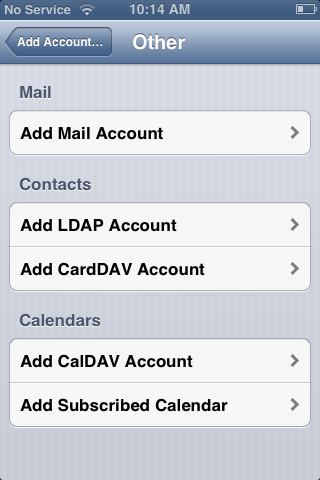
- Select Other from the list
- Select Add Mail Account
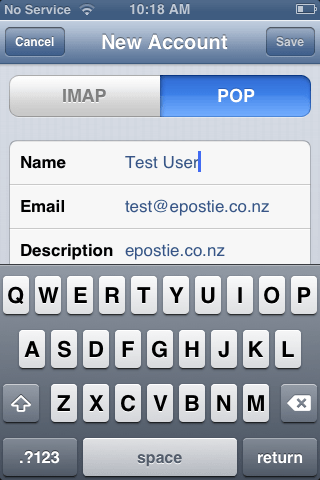
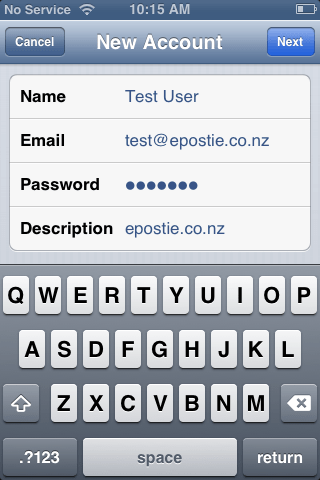
- Enter your name, the email address and password provided we provided you
- Click Next
- MAKE SURE you select POP at the top!
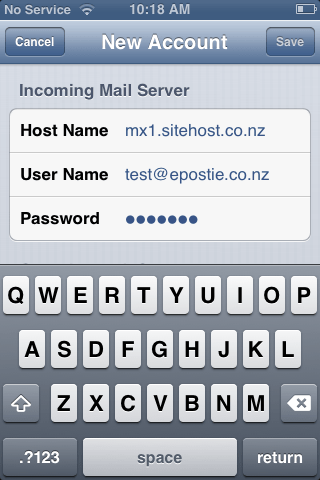
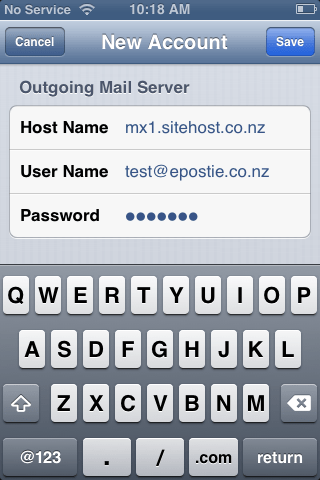
Scroll down to Incoming Mail Server:
- Host Name: mx1.sitehost.co.nz
- User Name: <the full email address we provided you>
- Password: <the password we provided you>
Scroll down to Outgoing Mail Server:
- Host Name: mx1.sitehost.co.nz
- User Name: <the full email address we provided you>
- Password: <the password we provided you>
Click Save. Apple's iOS has a little glitch here that confuses its users. It will initially fail to connect to the server as the server requires encryption to connect.
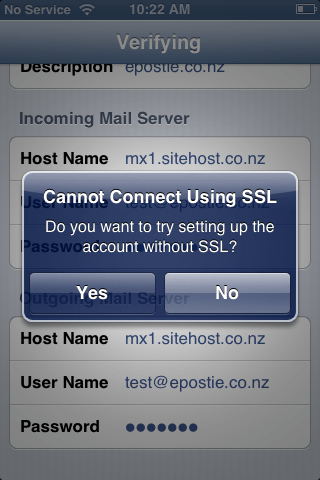
- Click No
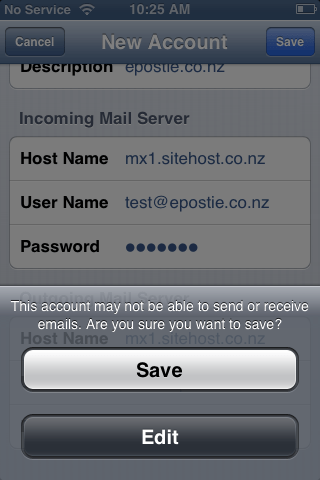
- This will return you to the same screen, after which you click the Save button again.
- It asks you to confirm with a warning that you may not be able to send or receive. Click Save.
- This will save the account and return you to the Accounts overview screen. Click the email you just set up.
- Scroll down to the bottom where you can see Outgoing Mail Server.
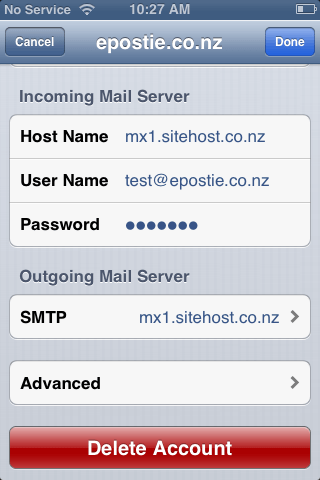
- Click SMTP mx1.sitehost.co.nz
- Under Primary Server, Click mx1.sitehost.co.nz again
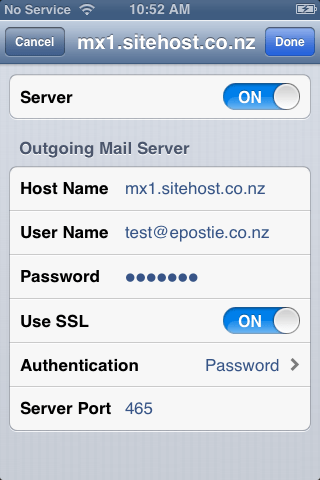
- Make sure Use SSL is ON and that you change the Server Port to 465
- Click Done and your SMTP settings should automatically verify
Now go back to the previous screen and click Advanced

- Please ensure you have Use SSL turned ON
- Change the Server Port to 995
- Return to the previous screen and click Done
Your iPhone/iPad should verify the settings and return you to the "Mail, Contacts, calendar" screen. and should now be ready for use.