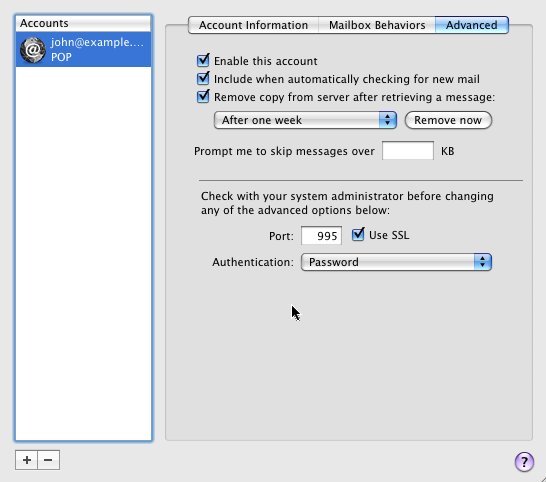
Add a POP3 account in Apple Mail 4.0
- Open your Apple Mail client
- Fill in the 'Welcome to Mail' window with the following information:
- Full Name: [your name]
- Email Address: your full email address [eg: john@example.co.nz]
- Password: your password
- Important: Hold the option button down until 'Create' turns into 'Continue'
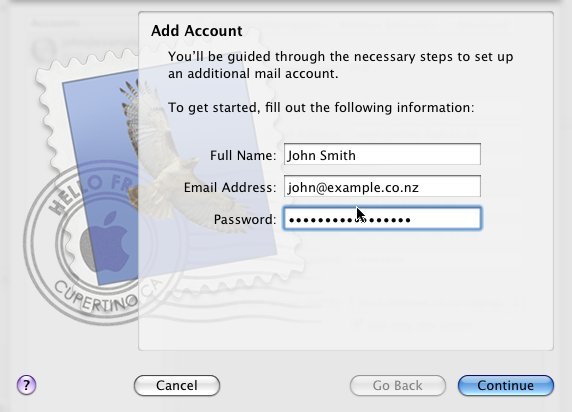
- Click Continue
- Fill in the following Incoming Mail Server information:
- Account Type: Select POP
- Incoming Mail Server: Change this to mx1.sitehost.co.nz
- User Name: your full email address [eg: john@example.co.nz]
- Password: your password
- Important: Hold the option button down until 'Create' turns into 'Continue'
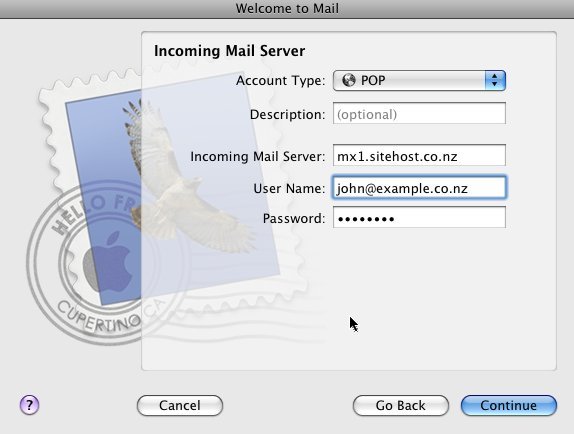
- Click Continue
- Incoming Mail Security
- Use Secure Sockets Layer (SSL): selected
- Authentication: Password
- Important: Hold the option button down until 'Create' turns into 'Continue'
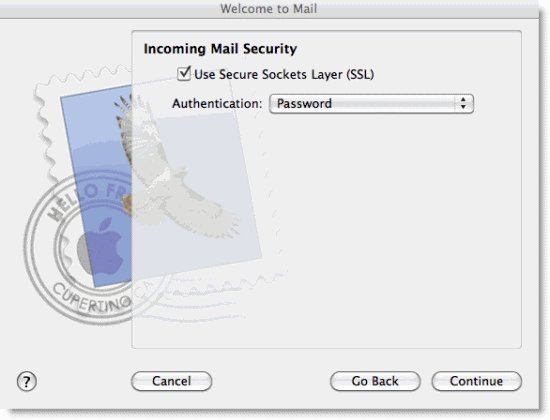
- Click Continue
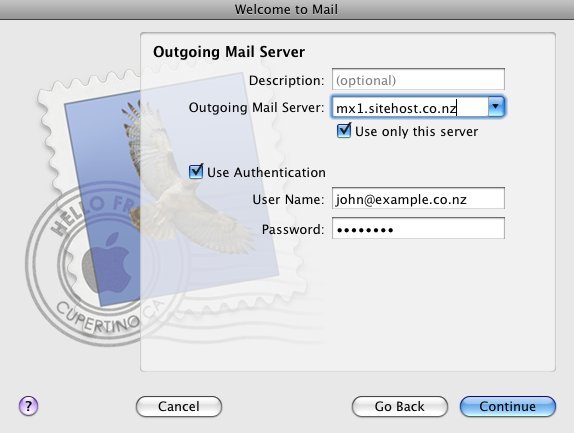
- Enter the following Outgoing Mail Server information:
- You can leave description blank - this field is optional
- Outgoing Mail Server: mx1.sitehost.co.nz
- Use Authentication: selected
- User Name: your full email address [john@example.co.nz]
- Password: your password
- Important: Hold the option button down until 'Create' turns into 'Continue'
- Click Continue.
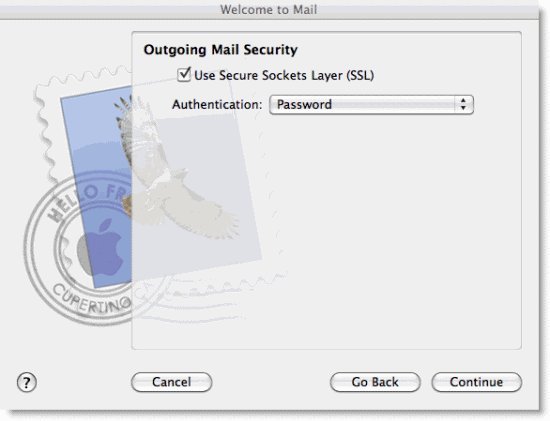
- Outgoing Mail Security
- Use Secure Sockets Layer (SSL): selected
- Authentication: Password
- Important: Hold the option button down until 'Create' turns into 'Continue'
- Click Continue
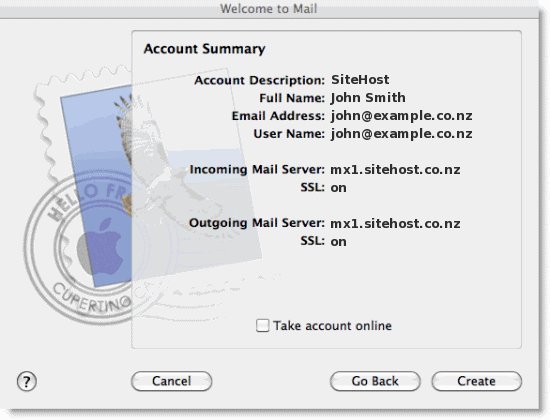
- Review your Account Summary and uncheck Take account online as you will need to adjust your incoming port number
- Click Create
- Once your client opens, you'll need to change your incoming port number to 995. To edit your incoming port number, please click Mail>Preferences... > Accounts tab > Advanced
- Important: Your port number must be 995
- Make sure you tick the "Remove copy from server after retrieving a message". There should be no need to leave the messages online for any longer than a week.
